

Key takeaways
- Learn how to prevent table saw kickback with a riving knife, aligned fence, sharp blade and safe feeding technique, plus a 10-point pre-cut safety checklist.
Table saw kickback is prevented mainly by a few habits done every time: keep a riving knife or splitter aligned behind a sharp blade, keep the fence parallel to the blade, never cut freehand, feed the workpiece with steady pressure and stand out of the line of the blade. Kickback can be sudden and severe, so this guide focuses on setup and technique that reduce the chance of it happening. Treat it as general education and follow your saw’s manual for model-specific instructions.
What kickback actually is
Kickback occurs when the back of the spinning blade lifts the workpiece and throws it back toward the operator. The blade teeth at the rear of the cut are moving upward, so anything they grab is pulled up and thrown. It most often begins when the wood pinches the blade, rotates into it, or lifts off the table.
The result can be a workpiece thrown with force, or a hand pulled toward the blade as the operator reacts. Because the event happens in a fraction of a second, prevention beats reaction. The goal of every step below is to remove the conditions that start it.
The most common causes
| Cause | Why it triggers kickback | Prevention |
|---|---|---|
| No riving knife or splitter | Cut closes behind the blade and pinches it | Use it for every through cut |
| Fence not parallel to blade | Stock binds against the blade rear | Check alignment and lock the fence |
| Freehand cutting | Stock rotates into the blade | Always guide with the fence or miter gauge |
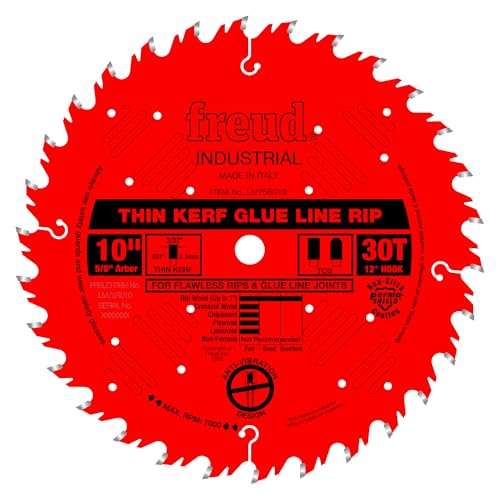
| Dull or dirty blade | Needs force, burns and binds | Sharpen, replace or clean the blade |
| Using fence and miter gauge together | Offcut traps between blade and fence | Use one guide at a time |
| Warped or wet lumber | Boards move as tension releases | Joint one face flat or choose straight stock |
Prerequisites before any cut
- The saw is unplugged whenever you change blades, inserts or accessories.
- The table and fence are clean and free of offcuts.
- Eye and hearing protection are on, and loose sleeves, jewelry and gloves are off.
- The area around the saw is clear, with enough room to support long boards.
- You have read the manual and know where the power switch and any emergency stop are.
Step-by-step setup that lowers kickback risk
- Install the riving knife. Follow the manual to fit it so it sits in the same plane as the blade, with only a small gap behind the teeth. A misaligned knife can cause the very binding it is meant to prevent.
- Check blade condition. Look for missing or chipped teeth, burn marks and pitch buildup. Replace damaged blades; do not run a cracked blade.
- Set blade height. A common guideline is to raise the blade so the gullets clear the top of the workpiece, rather than leaving it extremely tall. Check your manual for its recommendation.
- Align the fence. Measure the distance from the fence to the miter slot at the front and back, then adjust until they match. Follow the alignment procedure in the manual rather than improvising an offset.
- Use the guard where practical. Keep the blade guard and anti-kickback pawls installed for through cuts when the saw and the job allow it.
- Prepare the stock. One edge should be straight to ride against the fence, and one face flat on the table.
Feeding technique
Start the saw, let it reach full speed, and feed the board steadily without forcing it. Hold the stock firmly against the fence and the table, but keep your hands away from the blade line. Do not pull the board back through a running cut; if you must stop, switch off the saw, wait for the blade to stop and then remove the piece.
Push sticks and push blocks are not optional for narrow cuts. As a rule of thumb, if your hand would end up close to the blade, use a push device. Keep the push stick in good condition and replace it when the notch is chewed up. Keep the feed continuous through the end of the cut, then step back and let the offcut fall to the side or onto an outfeed support.
Worked example: ripping a long board
Suppose you plan to rip a long, slightly bowed board into narrower strips. Assume the board is about 8 feet long and one edge is not straight. First, straighten that edge using a jointer, a planer sled or a straight-line jig, since a curved edge cannot ride a fence safely. Second, set the fence, lock it and make sure the riving knife is in place. Third, set up outfeed and side support so the board does not sag as it leaves the table. Fourth, use push sticks to feed the final portion of the cut. Tipping or twisting while cutting is a sign to stop the saw, back away and reassess rather than pushing harder.
Cuts that deserve extra care
Crosscutting with a miter gauge or sled should use that guide alone, without the rip fence beside it for the cut length. If you need a stop, clamp a block well ahead of the blade so the offcut can drift away. Cutting small pieces, narrow strips or round stock can be hazardous without a jig, because the blade can grab and spin the piece.
Non-through cuts such as dados and rabbets can require removing the riving knife or guard, depending on the saw. Use the accessory and procedure approved in the manual, and use a featherboard or hold-down where appropriate.
Myths that lead to bad habits
One myth says a powerful saw cannot kick back. Power does not matter; geometry does. Another says the fence and the miter gauge can safely be used together to make a quick crosscut, when this is a classic way to trap an offcut against the blade. A third says experience makes the guard unnecessary. Experienced woodworkers still rely on setup, because kickback usually comes from a small unnoticed change, such as a board that moves as internal stress is released.
Ten-point checklist before you press the switch
- Blade sharp and clean.
- Riving knife aligned.
- Fence parallel and locked.
- Guard and pawls in place if suitable.
- Stock flat, dry and straight on the guide edge.
- Push stick within reach.
- Outfeed support ready.
- Eye and hearing protection on.
- Body positioned to the side of the blade line.
- No distractions, no rush.
When to stop and get help
If the saw vibrates, the blade wobbles, the arbor feels loose, the fence will not hold alignment or the guard hardware is damaged, stop using it and consult the manual or a qualified technician. If you are new to a table saw, a safety class or supervised practice session can be worth the time. Never defeat a safety feature to make a cut easier.
Related guides
- Table Saw Push Sticks And Featherboards
- Table Saw Blades For Ripping Hardwood
- Jobsite Table Saws For Contractors
Frequently asked questions
What causes most table saw kickback?
Kickback happens when the workpiece is caught by the rear of the blade and thrown toward the operator. Common triggers include a cut that pinches the blade, a fence that is not parallel to the blade, a missing riving knife, a dull blade, and freehand cutting. Wet or warped lumber and forcing a cut can also contribute. Most causes are preventable with correct setup.
Is a riving knife better than a splitter?
A riving knife moves up and down with the blade and sits close behind it, so it stays effective for many cuts and is generally easier to install and remove than older splitter designs. A splitter is fixed and sometimes unsuitable for non-through cuts. Use whichever device your saw’s manual specifies, and keep it aligned with the blade.
Can a sharp blade really reduce kickback risk?
Yes. A dull or pitch-coated blade needs more feed pressure and tends to burn or bind in the wood, and both increase the chance of a pinch. A clean, sharp blade of the right type for the job cuts more freely. Replace or sharpen worn blades, and clean pitch buildup with a cleaner approved for saw blades.
Where should you stand when making a cut?
Stand slightly to the side of the blade line rather than directly behind the workpiece, so that a thrown piece will not travel straight into your body. Keep your hands clear of the blade path and use push sticks or push blocks for narrow cuts. Never reach over a spinning blade to remove offcuts.
When should you stop and ask for help or training?
Stop if the saw vibrates, the fence will not stay aligned, the guard or riving knife is damaged, or you feel uncertain about a cut. Contact the manufacturer or a qualified technician for repairs, and consider a woodworking safety class. Read the instruction manual fully before using any table saw, and follow its warnings over general advice.



Write Your Review
No reviews yet. Be the first to share your experience!