

Key takeaways
- Work aisles: Plan around 42 inches (107 cm) for one cook or 48 inches (122 cm) for two cooks. In a tight galley, confirm that drawers and appliance doors can open without blocking essential access.
- Walkways: A route used for passing generally needs more room than a stationary work aisle. Around 36 inches (91 cm) is a useful minimum planning target for an unobstructed walkway; increase it when traffic is busy or turning is difficult.
- Counter height: About 36 inches (91 cm) is standard in many kitchens. If you are changing the height, check it against the primary cook’s comfort, appliance fit, and any accessibility needs.
- Landing space: Reserve counter near the refrigerator, sink, and cooking surface so hot pans and groceries have somewhere safe to go. NKBA planning recommendations commonly call for at least 15 inches (38 cm) beside the refrigerator and on one side of a cooktop, with additional landing area by the sink and on the other cooking side.
- Island seating: Allow room for stools to pull out without becoming a passageway obstruction. Measure with a person seated and with the nearest appliance fully open.
Choose the layout around the room, then size the clearances and storage to match how you cook
For a small kitchen, a one-wall or compact L-shaped layout usually preserves the most usable floor space; larger rooms can support a U-shaped plan or an island if circulation remains clear. As a practical starting point, allow about 42 inches (107 cm) for a one-cook work aisle and 48 inches (122 cm) where two people regularly pass, and prioritize durable, easy-to-clean surfaces over materials that demand more maintenance than you want to give them.
The best arrangement is not the one with the most cabinets or the biggest island. It is the one that gives the refrigerator, sink, and cooking area sensible connections, keeps work surfaces near the tasks they serve, and leaves enough room for doors, drawers, and people to move safely.
Our top picks
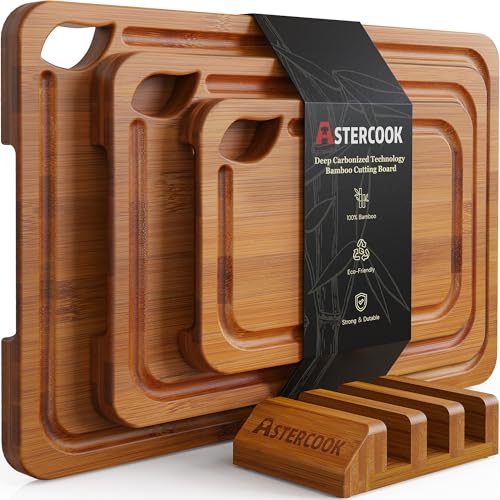
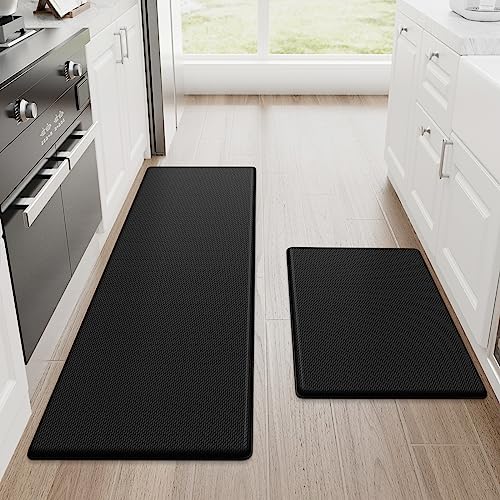


As an Amazon Associate we earn from qualifying purchases at no extra cost to you. Ratings are shown as listed on Amazon.
Compare layouts by room size and cooking habits
The dimensions below are planning ranges, not building-code requirements. Measure the room, cabinets, appliance doors, and walking routes before ordering. Local accessibility, ventilation, electrical, and building requirements may impose additional rules.
| Layout | Useful room width | Best fit | Main compromise |
|---|---|---|---|
| One-wall | About 8–12 ft (2.4–3.7 m) along the cabinet run | Studios, narrow rooms, and open-plan spaces | Limited continuous prep surface; tasks share one run |
| Galley | About 7–10 ft (2.1–3.0 m) across, including two cabinet runs and the aisle | Efficient cooking in a narrow room | Opposing doors and appliance handles can pinch the aisle |
| L-shaped | Often works in rooms about 10 × 10 ft (3.0 × 3.0 m) or larger | Flexible corner layouts and a small dining area | Corner cabinets can be awkward without accessible storage hardware |
| U-shaped | About 10–12 ft (3.0–3.7 m) across for two cabinet runs and a workable aisle | Frequent cooking and generous counter space | Three runs of cabinets can make a small room feel enclosed |
| Island | Often needs roughly 12–14 ft (3.7–4.3 m) across, depending on cabinets and clearances | Large, open kitchens that need a shared prep or serving surface | Costs floor area; seating and appliance doors need separate clearance checks |
Room dimensions alone do not determine whether a layout fits: a wide refrigerator, an oven door, or an island stool can obstruct the route. Treat the clear aisle as the space between opposing counter edges, not the room’s total width. For an island, measure clearances on every side that people use, and mock up its footprint with tape before committing.
Set counter, aisle, and landing-space clearances
Several kitchen-planning guidelines are commonly published by the National Kitchen & Bath Association (NKBA). They are planning recommendations, not a substitute for applicable local codes or an accessibility review.
- Work aisles: Plan around 42 inches (107 cm) for one cook or 48 inches (122 cm) for two cooks. In a tight galley, confirm that drawers and appliance doors can open without blocking essential access.
- Walkways: A route used for passing generally needs more room than a stationary work aisle. Around 36 inches (91 cm) is a useful minimum planning target for an unobstructed walkway; increase it when traffic is busy or turning is difficult.
- Counter height: About 36 inches (91 cm) is standard in many kitchens. If you are changing the height, check it against the primary cook’s comfort, appliance fit, and any accessibility needs.
- Landing space: Reserve counter near the refrigerator, sink, and cooking surface so hot pans and groceries have somewhere safe to go. NKBA planning recommendations commonly call for at least 15 inches (38 cm) beside the refrigerator and on one side of a cooktop, with additional landing area by the sink and on the other cooking side.
- Island seating: Allow room for stools to pull out without becoming a passageway obstruction. Measure with a person seated and with the nearest appliance fully open.
Worked fit check: Suppose a galley has two 24-inch (61 cm) cabinet runs and a 42-inch (107 cm) work aisle. Its clear inside width is approximately 24 + 42 + 24 = 90 inches, or 7 ft 6 in (229 cm). If a drawer or oven projects into the aisle when open, test that real-world condition too; the nominal aisle measurement does not guarantee comfortable access while the appliance is in use.
Arrange storage in task-based zones
Store items where they are used, not just wherever an empty cabinet happens to be. Grouping equipment into zones shortens trips across the room and makes storage easier to maintain.
- Food storage: Place pantry staples and frequently used dishes near the refrigerator or main prep area. Keep heavier goods on lower shelves and leave room for items bought in bulk.
- Preparation: Put knives, cutting boards, mixing bowls, and a compost or scrap container near a clear counter and the sink. A drawer immediately below the prep surface is often more useful than a distant cabinet.
- Cooking: Keep pans, cooking utensils, oils, and potholders close to the range, but not where heat or flame can reach them. Avoid storing flammable items against a cooktop.
- Cleaning: Group dish soap, cloths, and waste or recycling near the sink, while keeping cleaning products separate from food and out of children’s reach.
- Serving: Store plates, glasses, and cutlery between the dishwasher and the table or serving counter to reduce carrying distance.
For a small kitchen, use drawers for often-reached tools and reserve high or deep cupboards for occasional items. Pull-out shelves and drawer organizers improve access, but they consume some cabinet width and are additional hardware that may need adjustment or replacement. Before buying inserts, measure the cabinet opening, internal width, drawer depth, plumbing obstructions, and the products you intend to store.
Choose countertop and cabinet materials for the way you use the room
No surface is maintenance-free. Compare stain and heat tolerance, repairability, installation requirements, and the finish’s care instructions rather than relying on material names alone.
| Material | Typical thickness or construction | What it does well | Ownership trade-off |
|---|---|---|---|
| Laminate | Often about 1–1.5 in (2.5–3.8 cm) overall on a substrate | Lower-cost, broad range of appearances, simple routine wiping | Cut edges and seams can be vulnerable to water; avoid setting hot cookware directly on it |
| Butcher block | Commonly about 1.5–2 in (3.8–5.1 cm) | Can be sanded and refinished; warm appearance and a repairable surface | Needs finish-specific care; standing water can cause swelling or stains, especially at joints |
| Granite | Commonly about 1.25 in (3.2 cm) or 2 cm slabs with an edge build-up | Hard natural stone with distinctive patterns and good everyday durability | May need periodic sealing depending on the stone and sealer; chips and seams require repair expertise |
| Quartz surfacing | Often about 1.25 in (3.2 cm) or 2 cm slabs with an edge build-up | Consistent appearance and low-porosity routine cleanup | Resin-bound products can be damaged by excessive heat; follow the manufacturer’s guidance for cleaners and hot pans |
| Stainless steel | Gauge and backing vary by fabricator | Nonporous work surface used in many commercial kitchens | Shows scratches and fingerprints; dents depend on the steel, backing, and support |
These are common market configurations, not universal product specifications. Confirm exact dimensions, weight, support requirements, seam placement, finish, and care instructions with the fabricator or manufacturer. Stone slabs can be heavy and may require professional measurement and installation; countertop overhangs may need structural support. For an exposed butcher-block edge or a sink cutout, ask specifically how the surface should be sealed and maintained.
Cabinet construction matters as much as the door style. Check that shelves and drawer bottoms are appropriately supported for their expected loads, that hinges and slides are replaceable, and that finishes are compatible with the cleaning products you use. Near sinks and dishwashers, protect exposed edges from repeated moisture and repair leaks promptly.
Match the plan to the room and budget
| Your situation | Practical starting choice | What to check before buying |
|---|---|---|
| Very small room, limited renovation budget | One-wall run or compact galley; stock cabinets and laminate counters | Keep prep space beside the sink; verify appliance doors and drawers do not collide |
| Narrow room, frequent cooking | Galley with a clear work aisle and accessible drawer storage | Measure counter-to-counter width and open appliances; avoid turning the aisle into a through-route if possible |
| Medium room, shared cooking | L-shaped or U-shaped layout, depending on room width | Provide the wider two-cook aisle and avoid crowding the inside corner with appliance doors |
| Large open room, regular entertaining | L-shaped kitchen with a properly sized island, or a roomy U | Check stool pull-out, circulation, ventilation, electrical needs, and island support |
| Low-maintenance priority | Choose a surface and cabinet finish with straightforward care instructions | Ask about heat, stain, scratch, moisture, and cleaner limits; every material has some constraints |
Budget for the parts that are easy to overlook: installation, sink and faucet, backsplash, cabinet hardware, delivery, waste removal, and any plumbing or electrical work. A cheaper counter can be a sound choice if it suits the cooking routine and the cost saved goes toward better lighting, functional drawers, or professional installation.
Plan in this order to avoid expensive changes
- Measure the room and mark fixed features. Record wall lengths, ceiling height, doors, windows, outlets, vents, plumbing, and any uneven walls. This prevents a design from depending on space that does not exist.
- Place the appliances and sink. Start with the refrigerator, sink, and cooking surface, then check landing areas and the relationship between tasks. Confirm appliance specifications, including door swing, before finalizing cabinets.
- Draw the clearances at full scale. Mark aisle widths and island edges on the floor with tape. Open cardboard mock-ups or appliance doors to catch collisions before ordering.
- Assign storage zones. List the tools, food, cookware, and cleaning supplies you actually own, then allocate drawers and shelves by task. Include room for future replacement appliances or changes in household needs.
- Select materials and confirm installation requirements. Compare care instructions, seams, support, edge details, and warranty terms. Recheck measurements after cabinets are installed, before the countertop is fabricated.
Frequently Asked Questions
Is an island worth it in a small kitchen?
Usually not if it reduces the main aisle below a comfortable width or blocks an appliance door. A narrow movable cart or a peninsula may provide useful work surface without permanently taking up the center of the room.
How wide should a kitchen aisle be?
About 42 inches (107 cm) is a useful target for a one-cook work aisle, while 48 inches (122 cm) is more suitable when two people work there regularly. Measure between opposing counter edges and test the space with drawers and appliance doors open.
Which kitchen layout is best for a narrow room?
A galley layout often makes efficient use of a narrow rectangular room because work areas sit on two opposing runs. It works best when the aisle stays clear and traffic does not routinely pass through the active cooking area.
What is the most durable countertop material?
There is no single best choice for every kitchen: granite, quartz surfacing, stainless steel, laminate, and butcher block all have different strengths and failure points. Check the specific product’s heat, stain, scratch, and moisture guidance, and consider whether its maintenance and repair needs suit your routine.
Is butcher block practical near a sink?
It can be, but repeated moisture at seams, cutouts, and edges can lead to staining or swelling if the finish and maintenance are unsuitable. Follow the maker’s sealing and cleaning instructions, wipe up standing water, and ask a fabricator how the sink area will be protected.
How much counter space should I leave beside a cooktop?
NKBA planning recommendations commonly suggest at least 15 inches (38 cm) of landing space on one side of a cooktop and additional landing space on the other. The exact workable arrangement depends on the appliance, adjacent walls, local requirements, and whether hot cookware can be set down safely.





Write Your Review
No reviews yet. Be the first to share your experience!