

Key takeaways
- Guide rigidity: A side wall that flexes by 2–3 mm can create visibly different slices across a loaf.
- Base grip: Rubber feet or a removable non-slip mat matter more than decorative woodwork.
- Clearance: Measure the loaf after baking, not the dough before it rises. A 4-inch loaf can easily become 5 inches tall after cooling.
- Knife compatibility: A long, narrow serrated knife is usually easier to control than a short blade that requires repeated sawing.
- Crumb management: A tray or closed base catches debris, but removable parts are essential for proper cleaning.
The best home bread slicer for even slices is a sturdy adjustable guide with a rigid base, a crumb-catching tray, and enough clearance for your largest loaf; for most kitchens, a manual wooden or stainless-steel guide is a better value than a bulky electric machine.
Our top picks


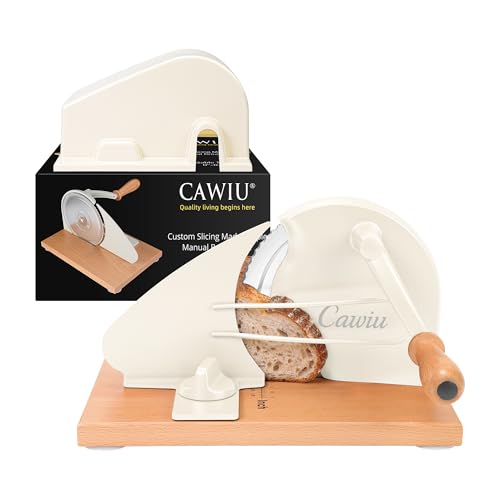

As an Amazon Associate we earn from qualifying purchases at no extra cost to you. Ratings are shown as listed on Amazon.
Best home bread slicers at a glance
| Pick | Best for | Typical slice range | Loaf capacity | Storage footprint | Typical market range |
|---|---|---|---|---|---|
| Zassenhaus Classic Bread Slicer | Frequent slicing and premium build | Approximately 1–20 mm, depending on setting | About 5 in wide and 5 in high | Approximately 15 × 10 in | $120–$180 |
| Norpro Bread Slicer with Crumb Catcher | Budget-conscious everyday use | About 10–20 mm with the guide in place | About 5 in wide and 5 in high | Approximately 13 × 9 in | $25–$45 |
| Fold-flat adjustable bread-slicing guide | Small kitchens and occasional baking | Usually 10–25 mm | Typically 4–5 in wide and 4–5 in high | About 12–15 × 5–8 in when folded | $20–$50 |
| Electric bread slicer with thickness control | High-volume slicing and weaker hand control | Usually 5–25 mm | Often 5–6 in wide and 5 in high | Approximately 16–20 × 10–14 in | $150–$350 |
These are useful buying figures rather than universal specifications. Dimensions, adjustment ranges, and included accessories vary between revisions and sellers, so check the current manufacturer sheet before ordering. The important comparison is how securely the loaf is held while the knife travels through it.
Top picks by situation
Best overall: Zassenhaus Classic Bread Slicer
The Zassenhaus Classic Bread Slicer is the strongest choice for someone who bakes several loaves a week and wants repeatable slices without plugging in a machine. Its substantial frame and adjustable cutting mechanism give it better control than lightweight plastic guides. It is particularly well suited to compact sandwich loaves, sourdough boules that have been shaped into a narrower profile, and firm rye bread.
Its advantage is not merely the thickness dial. A stable base prevents the loaf from shifting as the blade meets a dense crust, which helps keep the first and last slices from becoming wedge-shaped. The trade-off is weight and price: this is equipment that occupies a permanent place on a counter or must be lifted into a cupboard after use.
Best budget choice: Norpro Bread Slicer with Crumb Catcher
The Norpro Bread Slicer with Crumb Catcher is a sensible entry point for occasional home bakers. Its guide rails help maintain a consistent knife angle, while the catcher keeps loose crumbs from spreading across the worktop. It works best with fully cooled, medium-sized loaves rather than very tall boules or oversized artisan bread.
Expect good consistency when you guide the knife slowly and keep the loaf pressed against the side stop. Lightweight construction can become a weakness with hard crusts: if the base slides, thickness variation rises quickly. A damp, non-slip mat underneath is a cheap improvement. This pick makes sense when the goal is neater slices, not commercial-level throughput.
Best for a small kitchen: fold-flat adjustable guide
A fold-flat bread-slicing guide is the best choice when storage matters more than speed. These models generally use hinged side panels, removable rails, or a collapsible frame and can fit in a narrow drawer after cleaning. Look for a folded thickness of less than 3 inches, a locking hinge, and a base at least 10 inches long.
Foldable designs vary widely in rigidity. The best ones have a broad base and positive stops at common thicknesses, such as 10, 15, and 20 mm. Avoid a guide that relies only on friction to hold its sides open; repeated folding can loosen the joints, allowing the loaf to drift. This category is ideal for one or two loaves per week, especially if your counter is shared with a mixer or toaster oven.
Best for frequent slicing: electric bread slicer
An electric slicer is appropriate when you slice several loaves in one session or need a powered feed system. It can produce highly uniform slices because the loaf passes through a fixed cutting path, but the machine is larger, louder, and more demanding to clean. Some models are designed for deli-style slices and may not accommodate a tall, irregular homemade loaf.
Choose one with a guarded blade, a removable crumb tray, an adjustable thickness control, and an overload or thermal shutoff. An electric machine does not eliminate technique: bread that is still warm, sticky, or underbaked can smear the blade and produce less consistent results than a manual guide.
What actually determines slice consistency?
- Guide rigidity: A side wall that flexes by 2–3 mm can create visibly different slices across a loaf.
- Base grip: Rubber feet or a removable non-slip mat matter more than decorative woodwork.
- Clearance: Measure the loaf after baking, not the dough before it rises. A 4-inch loaf can easily become 5 inches tall after cooling.
- Knife compatibility: A long, narrow serrated knife is usually easier to control than a short blade that requires repeated sawing.
- Crumb management: A tray or closed base catches debris, but removable parts are essential for proper cleaning.
For sandwich bread, 12–15 mm is a practical everyday setting. At 15 mm, a 900-gram loaf producing approximately 18 slices gives roughly 45 grams per slice before accounting for the end pieces. At 20 mm, the same loaf may yield about 13–15 slices. Thicker slices are more forgiving of a soft crumb; thinner slices demand a fully cooled loaf and a sharper blade.
Decision matrix
| Your situation | Recommended type | Why | What to compromise on |
|---|---|---|---|
| Budget under $50, one loaf weekly | Norpro-style manual guide | Low cost and adequate alignment | Less stability with hard crusts |
| Several loaves weekly, consistent sandwich slices | Heavy adjustable manual slicer | Better repeatability and durability | Counter space and higher price |
| Very limited storage | Fold-flat guide | Stores in a drawer or narrow cupboard | More setup and potentially looser hinges |
| Multiple loaves in one session | Electric slicer | Fast, guided cutting | Noise, cleaning, and footprint |
| Large boules or tall loaves | Wide manual guide or adjustable electric model | Greater height and width clearance | Usually higher cost |
How to get more even slices
- Cool the loaf completely. Wait until the interior is no longer warm. Cutting early compresses the crumb and makes the loaf harder to hold.
- Trim an uneven end if necessary. A flat starting face gives the guide a stable reference surface.
- Set the thickness before inserting the bread. Use the same stop for the whole loaf rather than adjusting mid-way.
- Keep the loaf against the side rail. Apply light sideways pressure, not downward force.
- Use long, gentle strokes. Let the serrations cut the crust instead of forcing the knife through it.
- Brush away crumbs after each loaf. Crumbs trapped under the base can prevent it from sitting level on the next use.
Durability, cleaning, and common ownership problems
The parts that usually wear first are hinge points on folding guides, rubber feet, thickness stops, and the serrated knife rather than the main frame. Replacement feet or a new bread knife can extend the useful life of an inexpensive guide. Do not soak unfinished wood: wipe it with a barely damp cloth, dry it immediately, and follow the maker’s recommendation for occasional food-safe oil.
Plastic and stainless-steel crumb trays are easier to wash, but inspect seams where flour and moisture collect. Never store a bread slicer with crumbs trapped beneath a removable panel. On electric models, unplug before cleaning, keep the motor housing dry, and follow the blade-removal instructions. A dull knife increases pressure, which can flex a lightweight guide and reduce consistency.
Final recommendation
Choose the Zassenhaus Classic Bread Slicer if you bake often and can spare permanent counter or cupboard space. Choose the Norpro model for an inexpensive improvement over freehand cutting, and choose a fold-flat adjustable guide when storage is the deciding factor. An electric slicer is justified mainly by volume. Whichever design you buy, prioritize loaf clearance, a non-slip base, removable crumb control, and a thickness stop that locks securely; those features matter more than the number of settings printed on the box.

Write Your Review
No reviews yet. Be the first to share your experience!